So, our great application is now ready
for deployment after all the hard work that has gone in development and
testing. But how are we going to distribute our applications to all the users
in the world? Well, you need not worry, you can package your application and
these packages can be deployed on any Mac systems.
Creating packages is an easy and
standard way to distribute your applications for Mac. Along with ease, you get
a lot of options through which you can carry out a full-fledged installation
including requirements check, pre-install and post-install actions. So, even if
you need a complex environment for your application to run like changing
permission or whatever, packages can still do it for you.
Let’s move on to how to create
packages. Again, you have got many options: Do it using GUI mode of
PackageMaker or use its command-line mode or use the productbuild command to
create the packages. It’s all up to you what you end up using. However, all of
the above mentioned methods have their pros and cons. We will go through them
one by one:
PackageMaker GUI mode:
Well, it’s a no-brainer. If you follow the on-screen messages, you will know what options to use for what purpose and you will end up with a decent package ready for distribution. In case you need more detailed steps:
- Launch the PackageMaker
application.

- It will ask you which
version of OS you are targeting and an identifier for your package. Select the
minimum version which you have to support. If you select 10.4, bundle packages
will be created since 10.4 does not support flat packages.

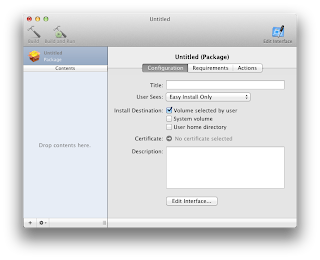

- You can use the options provided in the 3 tabs:
- Configuration: Allows you to set general properties of components like title, identifier, whether you require restart after installation, etc.
- Requirements: Allows you to set the requirements which must be met before your package can be installed on the system. See the screenshot below.
- Actions: Allows you to add your own scripts- preinstall and postinstall which will be run before and after your payload is dumped in the system.

- Drag and drop the components to be installed to the left-side pane. You can add different sub-components as choices. Choices provide a lot of flexibility to your package. For example, if you have some optional sub-packages, the user will be able to choose whether to install that package or not.

- You can select properties of individual components as well. If you want to allow relocation of your .app files or to allow downgrade of packages, select the corresponding checkbox.
- Relocation allows you to replace the .app file in-place if the application is already installed on your system.
- Downgrade allows you to install older versions on top of newer versions.

- And then you have got options to modify the background image of the installer and add the required resource files like License, Read Me, etc.
- You can add localization and provide localized resources as well if required.
And that’s it. Build the package and you have your Mac Installer ready for distribution.


.
PackageMaker command-line mode:
You can also achieve most of the
functionality provided by GUI mode from the command-line mode of PackageMaker.
If you have to create packages very frequently or for large number of products,
then it’s a good idea to automate that process. You can use the command-line
mode of packagemaker for all you automated package creation. See manual page for Packagemaker for details on various options available.
However, there are several issues in
command-line version of Packagemaker. I have given solution to some of the common
problems you may face.
Problems and Solutions:
- I have bundle packages. Will they work on MacOS 10.8 (Mountain Lion)?
- Mountain Lion introduces “Gatekeeper” which allows only signed apps to run on the system. We CAN NOT sign bundle packages and hence if the Gatekeeper is turned ON, bundle packages will not install on 10.8 if they have been download via web. However, if these packages have not been downloaded via web or the Gatekeeper is turned OFF, then bundle packages will install as expected.
- Why is the Finder not showing the version of the flat packages?
- Finder gets the version information of an archive from the info.plist file present inside the archive. So, in old-style bundle packages, we were able to see the version of the package in the Finder. However, flat packages behave as files. They do not behave like an archive. So, Finder will not be able to show the version.
- I am not able to sign my packages using packagemaker. Why?
- It is possibly a bug with packagemaker. Packages signed using packagemaker don’t work. You can use “productsign” command-line tool to sign your packages. See manual page for productsign for more information.
- I am creating a distribution package from command-line. I am providing localized license files to --resources flag but when I run the package, I don’t get the License page during installation. Why?
- Again, it is possibly a bug with packagemaker. It does not include the license file information in the Distribution file of the created package. Open your package using Flat Package Editor and check if the Distribution file has the attribute <license file=“License.rtf”/>.
- You can fix this issue in your package even without rebuilding the package.Follow the instructions below:o Expand the package using pkgutil command.
pkgutil --expand ABC.pkg ABC_expanded.pkg
o Open the ABC_expanded.pkg using Show Package Contents.
o Open the Distribution file and add this line at same hierarchy level as <title> </title>
<license file="License.rtf"/>
o Save and close the file. Make sure the resources directory is present and contains the necessary resources (License files in this case).
o Flatten the package using pkgutil.
pkgutil --flatten ABC_expanded.pkg FinalPkg.pkg
o Run the FinalPkg.pkg and it should show the License files. - Alternatively, check “productbuild” command. If you use this command, you can specify your own Distribution.dist file while creating the package. Check manual page for productbuild for more information.
- How can I check if my installer is signed?
- Use pkgutil --check-signature pkg-path
Productbuild command:
You can also build packages using
productbuild. This command provides you many different options to create a
package than those in packagemaker. However, you can only create flat packages
using this. It has three different modes:
·
You can create a product
archive for your application bundles.
o
productbuild [--product definition-plist] {--component component-path [install-path]} product-output-path
·
Create a product archive
using a distribution file.
o
productbuild [options]
--distribution dist-path
[--package-path search-path] product-output-path
·
Synthesize a
distribution for one or more component packages.
o
productbuild --synthesize [--product
definition-plist] {--package pkg-path} distribution-output-path
For more details about this command, see
manual page for productbuild.
So,
this was a little explanation about packaging in Mac. There are a lot of
details which have not been covered here. However, I will try to post more
articles about this. For now, Adiós!